Developing and managing an application in OpenShift
In this lab we will explore some of the common activities undertaken by developers working in OpenShift. You will become familiar with how to use environment variables, build configurations, and more. Let’s look at some of the basic things a developer might care about for a deployed app.
See the app in action and inspect some details
There is no more ambiguity or confusion about where the app came from. OpenShift provides traceability for your running deployment back to the docker image and the registry it came from, as well as (for images built by openshift) back to the exact source code branch and commit. Let’s take a look at that.
Goto the terminal and type the following:
$ oc statusA deployment in OpenShift is a replication controller based on a user defined template called a deployment configuration
The dc provides us details we care about, allowing us to see where our application image comes from, so let's check it out in more detail.
Type the following to find out more about our dc:
$ oc describe dc/webappThere are a few other ways you could get to this information. If you are feeling adventurous, you might want to describe the replication controller (oc describe rc -l app=webapp), the image stream (oc describe is -l app=webapp) or the running pod itself (oc describe pod -l app=webapp).
Because we built this app using S2I, we get to see the details about the build - including the container image that was used for building the source code. So let's find out where the image came from. Here are the steps to get more information about the build configuration (bc) and the builds themselves.
Type the following to find out more about our bc:
$ oc describe bc/webappType the following:
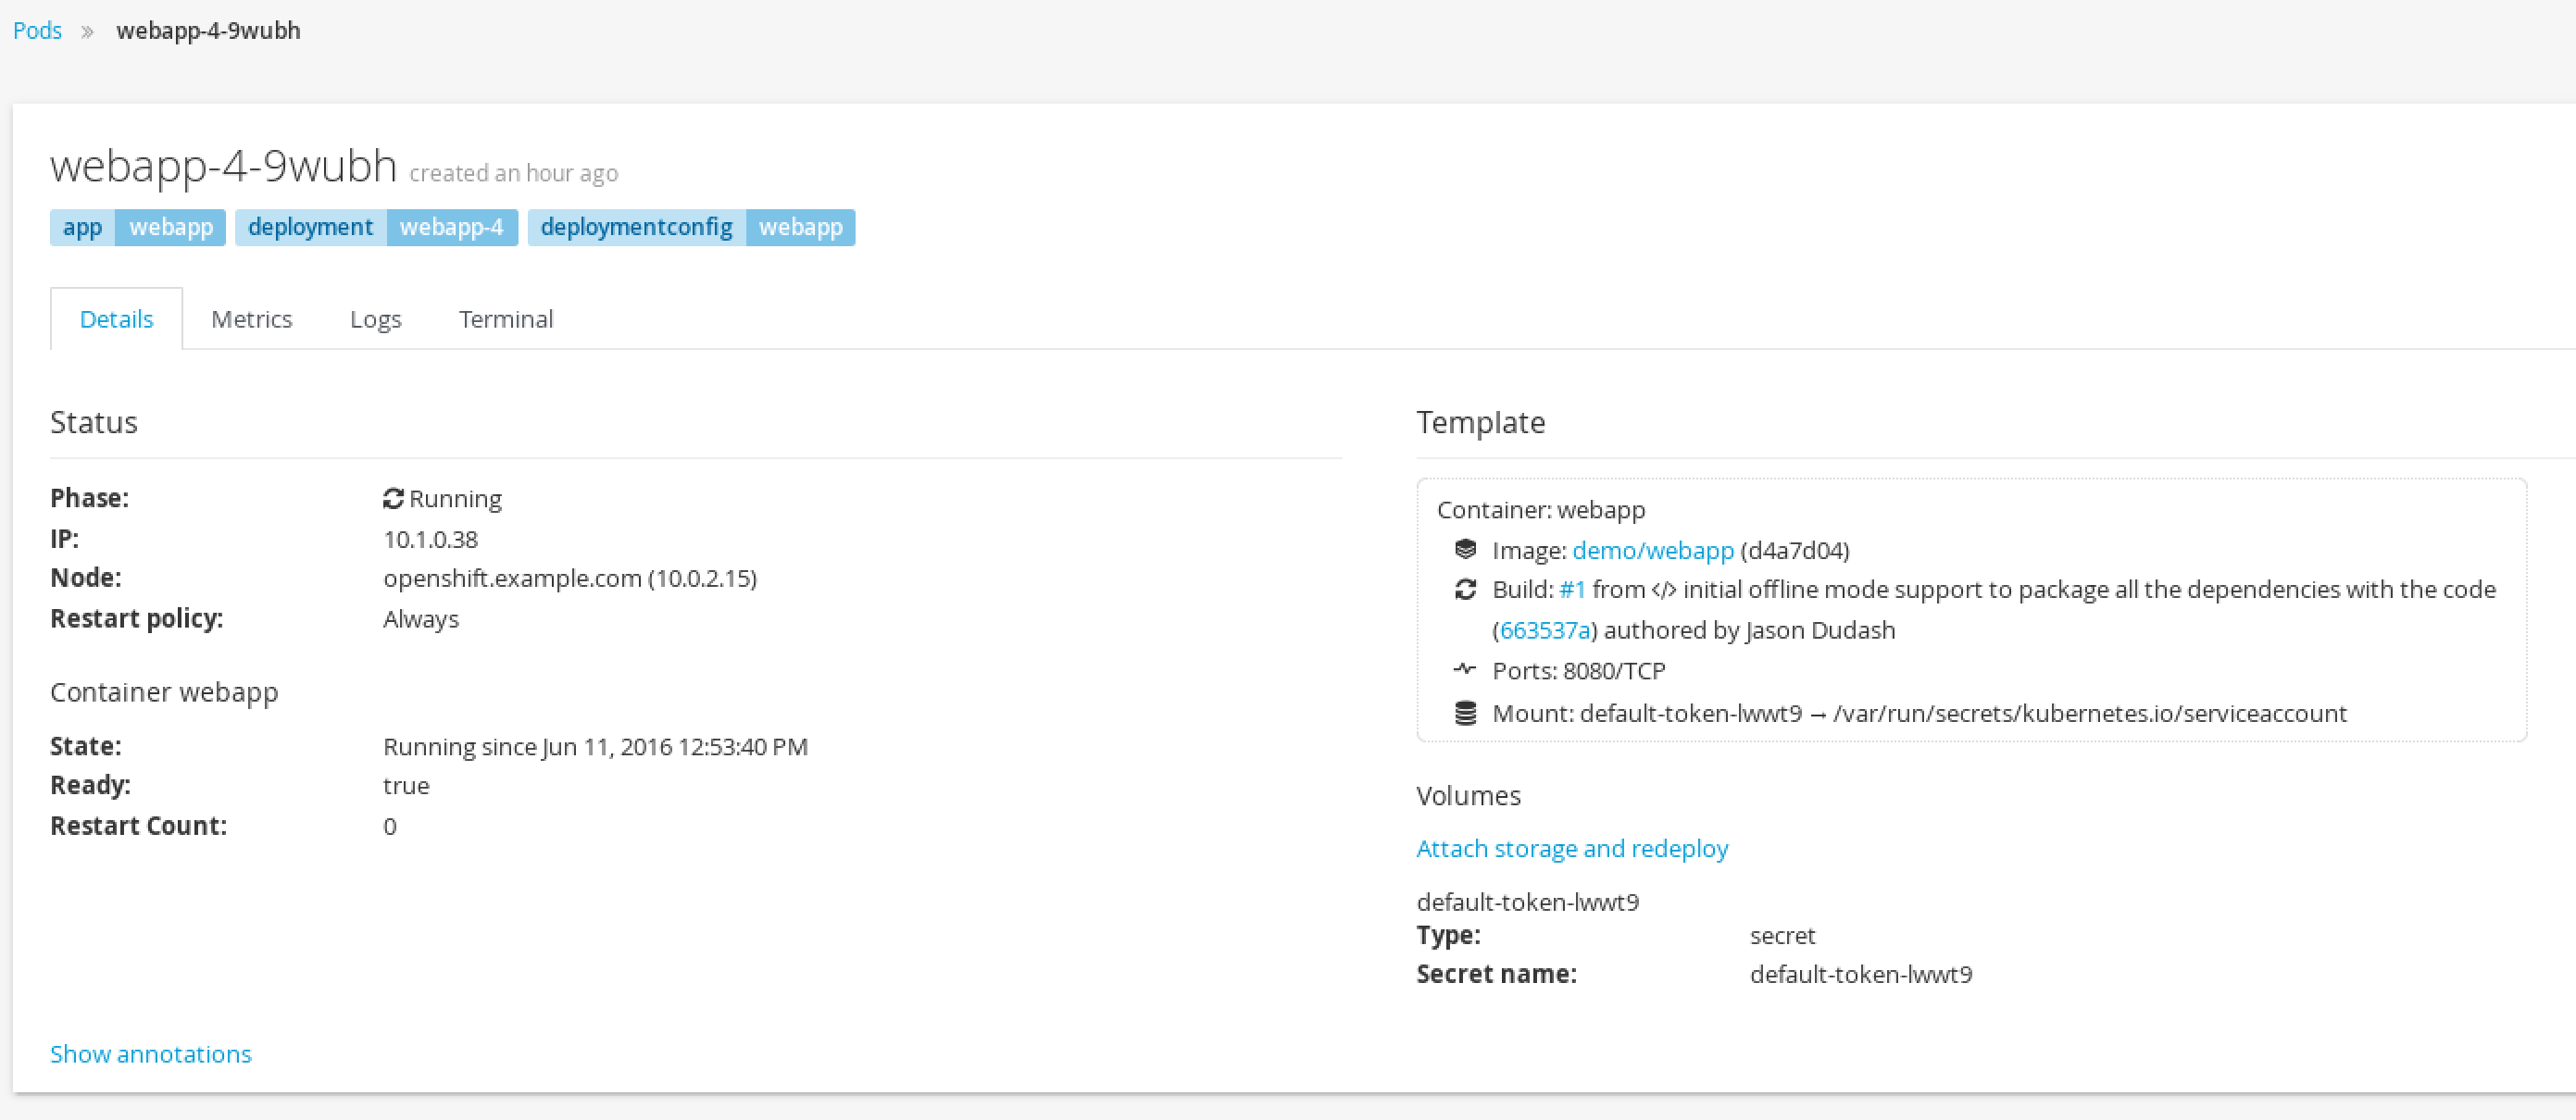
$ oc describe build/webapp-1Click "Overview"Check out the details within the deployment (next to the Pods circle). Within the deployment for the webapp is a container summary that shows both the GUID for the image and the GUID for the git branch.

Click on the link next to "Image:"Here are the details of the image stream for this deployment.

Click "Overview" to get back to the deployment summary
Click "#1" to see the build detailsBecause we built this app using S2I, we get to see the details about the build - including the container image that was used for building the source code. Note that you can kick-off a rebuild here if something went wrong with the initial build and you'd like to attempt it again.
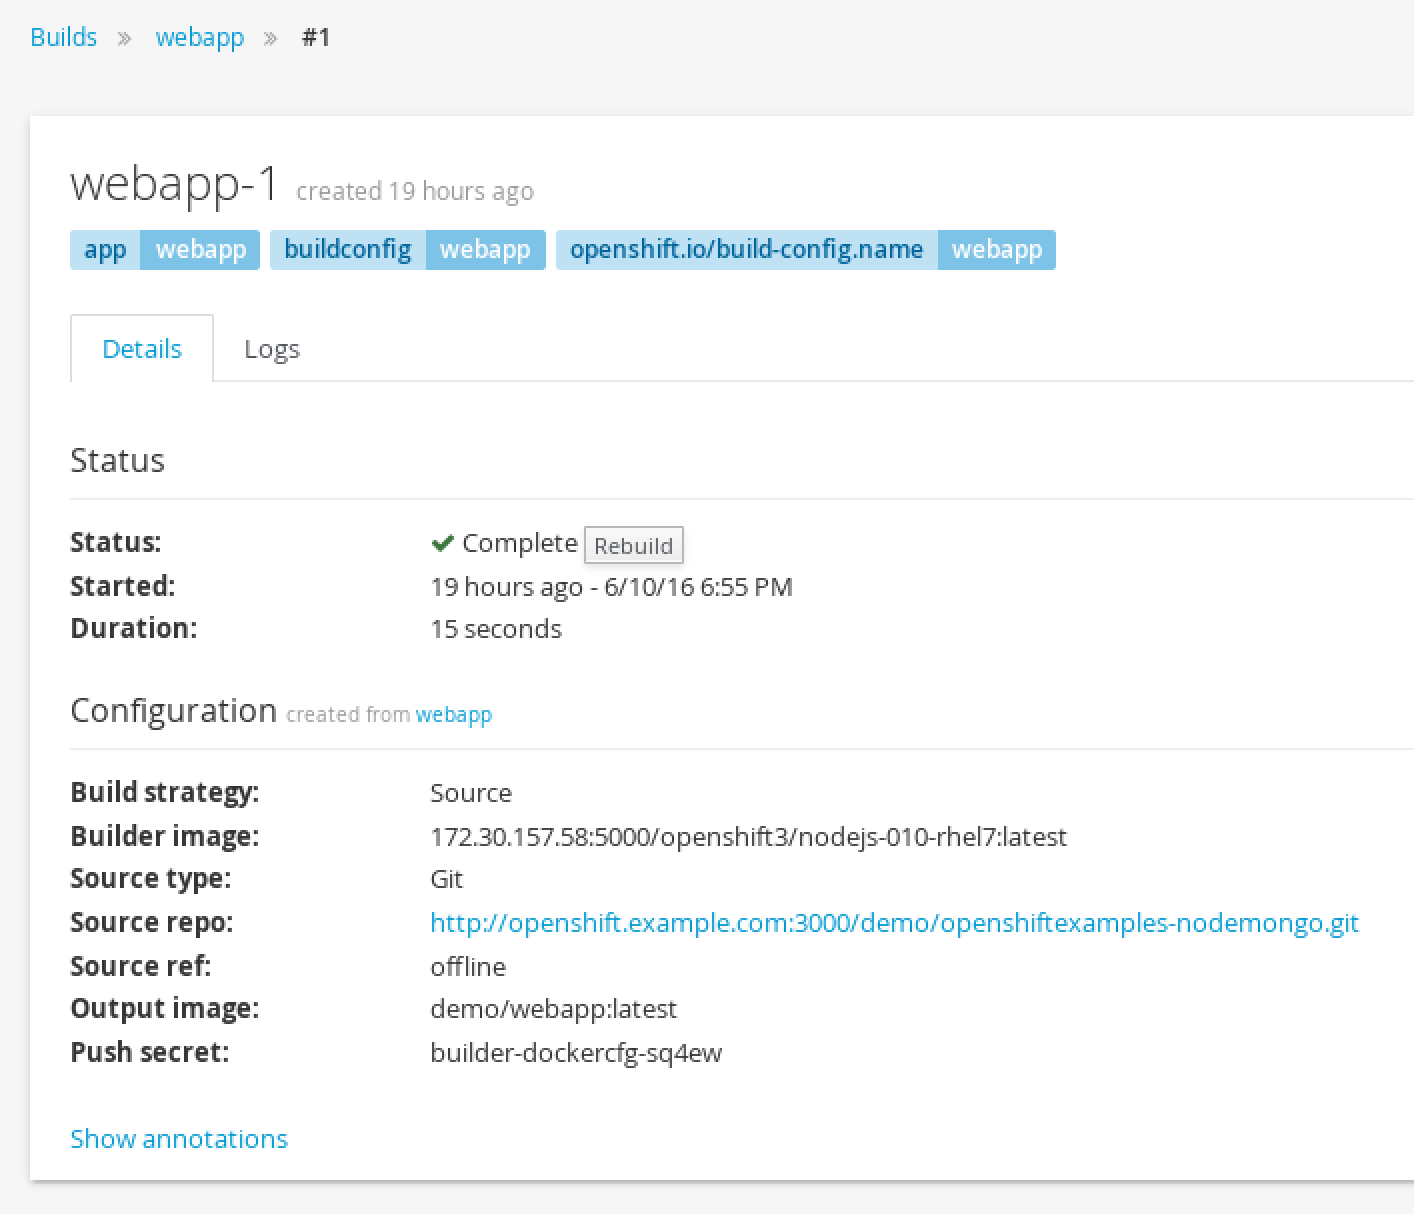
Click "Overview" to get back to the deployment summary againNotice that next to the build # you can see the comment from the last commit when the build was started. And you can see the that commit's author. You can click that commit GUID to be taken to the exact version of the source code that is in this deployed application.

Pod logs
In the S2I lab we looked at a build log to inspect the process of turning source code into an image. Now let’s inspect the log for a running pod - in particular let’s see the web application’s logs.
Goto the terminal and type the following:
$ oc get podsGoto the terminal and type the following (replacing the POD ID with your pod's ID):
$ oc logs [POD NAME]You can see more details about the pod itself with 'oc describe pods/[POD NAME]'
Hover over "Browse" and then click on "Pods"This is going to show basic details for all pods in this project (including the builders).
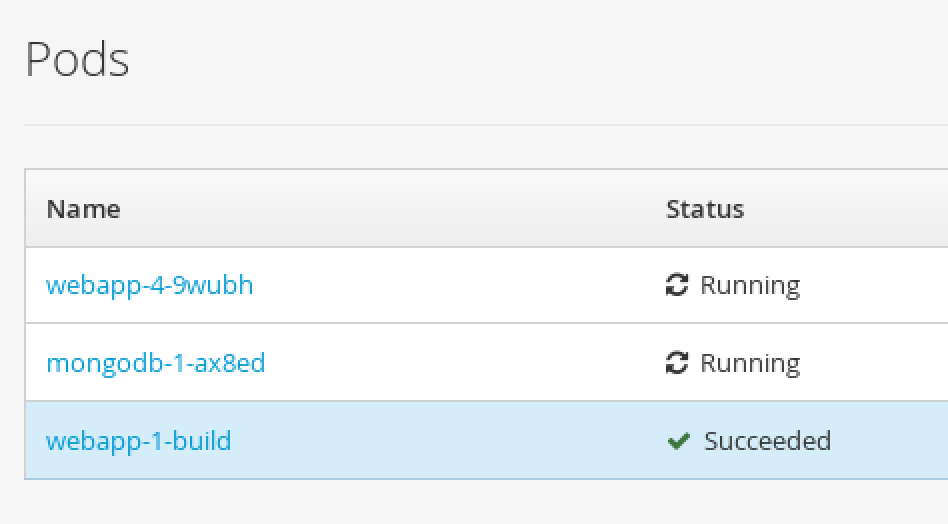
Click the pod that starts with "webapp-" and has a status of Running
Click the "Logs" button

How about we set some environment variables?
Whether it’s a database name or a configuration variable, most applications make use of environment variables. It’s best not to bake these into your containers because they do change and you don’t want to rebuild an image just to change an environment variable. Good news! You don’t have to. OpenShift let’s you specify environment variables in your deployment configuration and they get passed along through the pod to the container. Let’s try doing that.
Goto the terminal and type the following:
$ oc env dc/mongodb --list | grep MONGODB | oc env dc/webapp --overwrite -e -$ oc get pods -wType Ctrl+C to stop watching the podsTip: You can set env variables across all deployment configs with 'dc --all' instead of specifying a specifc config
Hover over "Browse" and then click on "Deployments"This is going to show basic details for all deployment configurations in this project
Click the "webapp" deployment config

Switch to your terminal and type:
$ oc env dc/mongodb --list | grep MONGODB | oc env dc/webapp --overwrite -e -
Go back to the summary view by clicking "Overview" on the left menu barIf you are quick enough you will see a new pod spin up and an the old pod spin down. This is due to the deployment config strategy being set to "Rolling" and having a "ConfigChange" trigger, OpenShift auto deployed a new pod as soon as you updated with the env variable.
With the new environment variables set the app can now talk to the database and should look like this in your web browser:
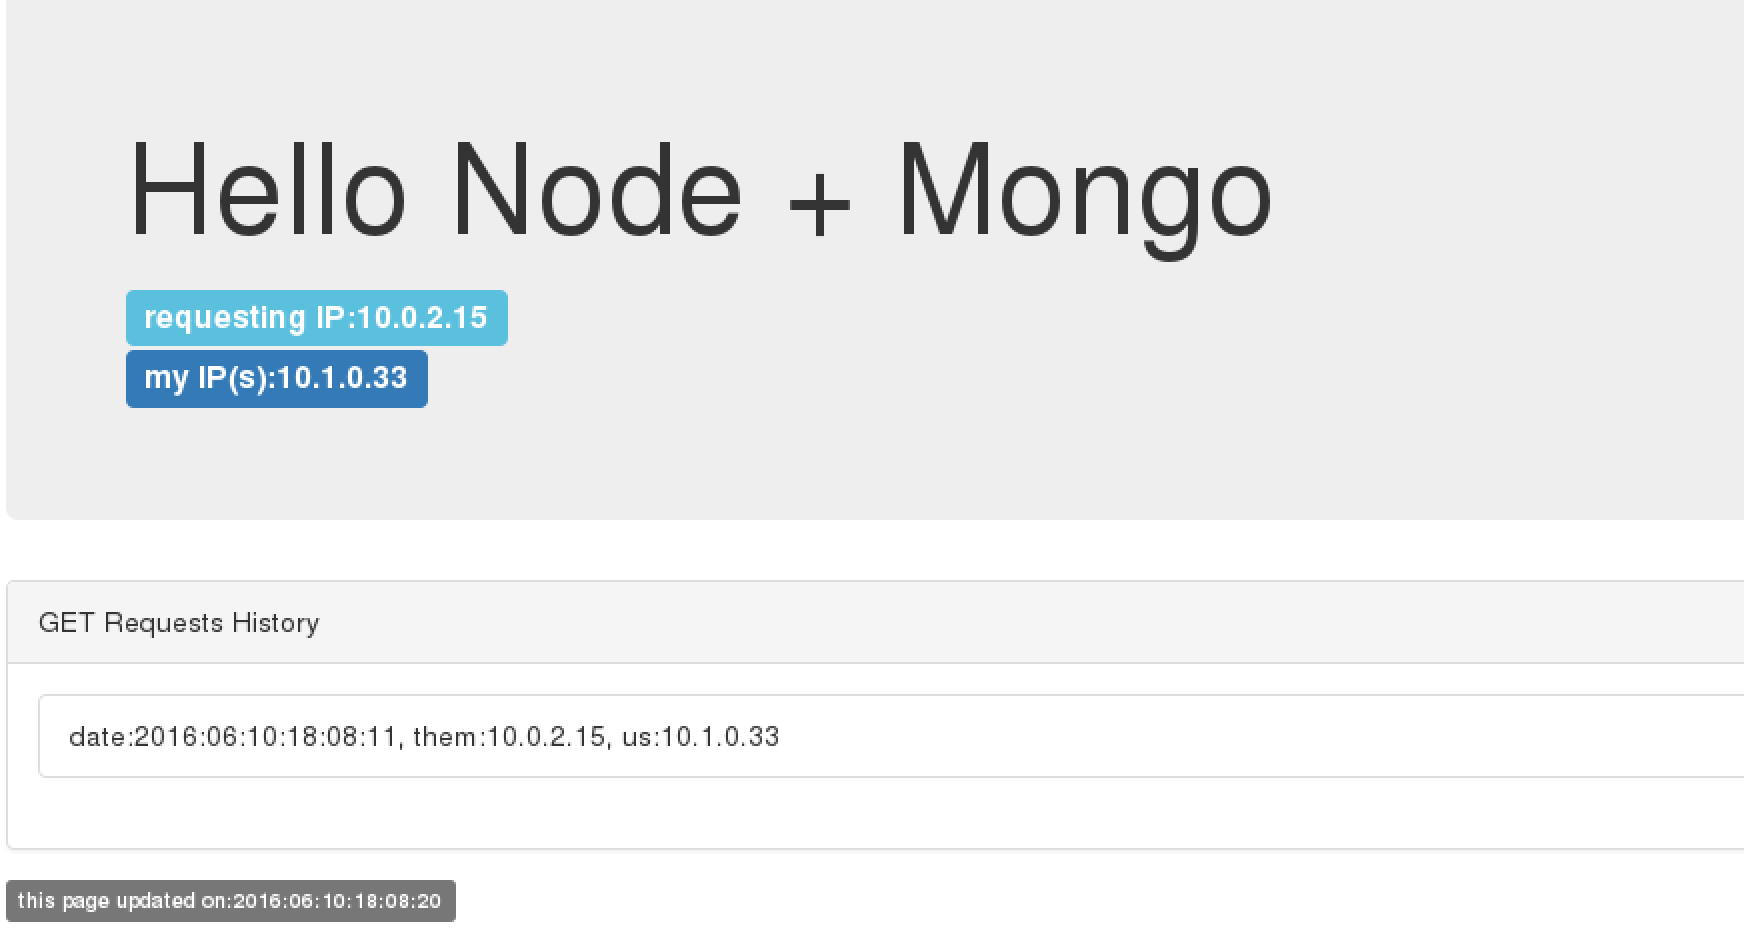
If you refresh the webpage a few times you will see it logging IP addresses into the database.
What about passwords and private keys?
Environment variables are great, but sometimes we don’t want sensitive data exposed in the environment. We will get into using secrets later when you do the lab: Keep it Secret, Keep it Safe
Getting into a pod
There are situations when you might want to jump into a running pod, and OpenShift lets you do that pretty easily. We set some environment variables in this lab, let’s jump onto our pod to inspect them.
Goto the terminal and type the following:
$ oc get pods$ oc exec -it [POD NAME] /bin/bash$ env | grep MONGODB$ exitHover over "Browse" and then click on "Pods"
Click the pod that starts with "webapp-" and has a status of Running
Click the "Terminal" button

Inside the web page's terminal type: 'env | grep MONGO'That should return all the **MONGODB_XXX** variables matching the values that we set in the deployment config (and some additional ones that were set automatically).
Summary
In this lab you’ve seen how to trace running software back to its roots, how to see details on the pods running your software, how to update deployment configurations, how to inspect logs files, how to set environment variables consistently across your environment, and how to interactively attach to running containers. All these things should come in handy for any developer working in an OpenShift platform.
To dig deeper in to details behind the steps you performed in this lab, check out the OSE developer’s guide.